Home › Forums › Wooden Boat Building › Deck installation CLC kit
- This topic has 12 replies, 4 voices, and was last updated 6 years, 8 months ago by
Marty Calon.
-
AuthorPosts
-
May 12, 2018 at 12:25 pm #10093
Marty Calon
ParticipantI posted this on the CLC site a few days ago, no response yet, thought I might as well post it here also:
The instructions for deck installation on the Cocktail Class racer call for joining the two halves of the deck with a splicing board, it’s called a “king plank” in the instruction manual. Then the deck is installed as a single piece (pages 97-101).
This is fine except that the instructions call for about 35 large spring clamps on each side, or about 70 total. While we have access to a substantial number of clamps, there’s no way we can come up with 70 large ones, and I’d rather not buy a large number for this one time we’re ever likely to use them.
This leads to the following idea: Install one side of the deck, already attached to the king plank, let the epoxy set, then install the other side. Aside from accurate alignment, it seems the critical factor here is to apply sufficient weight to the joint area to completely hold down the second deck piece while the edge along the hull is clamped and the rest of the attachment is done.
Has anyone done this? Does anyone have an opinion as to whether this is a bad idea? We don’t want to attempt this if it turns out, from the community’s experience, to be a bad idea and not likely to turn out well.
May 16, 2018 at 7:26 pm #10134 RickKeymaster
I am also building a CLC boat, but I sourced my material locally and used the CLC plans. Since I used a 4 x 8 sheet for the deck, I don’t have the king plank joint like you do, but I still have the problem of all those clamps.
When I get to clamping the deck, I plan to experiment with using PVC pipe to make some inexpensive clamps. It will take a little experimentation and trial & error, but if it works out, I can have as many clamps as I need for very little expense. I am also going to make a tool, kind of like a c-clip expanding tool to place the clamps on the boat. It will be something like a pair of pliers with some metal rod bent and welded to them so that two parallel prongs will expand when the handles are squeezed causing the clamps to open. Here is a video that explains the clamps. This is another video that adds handles to the clamps. If anyone tries this, let us know what diameter and pipe length works best.
Rick
May 17, 2018 at 7:47 pm #10135Marty Calon
ParticipantRick, it will be interesting to see how it goes with the PVC clamps, what size you used, how much of an opening you cut in them, and how well they clamp. Good luck with it!
We have another motivation to install the deck in two pieces: It seems like an easier way to do it, rather than manhandling that big unwieldy piece into position and tying down all of it. We’ll do it in two steps, and I’ll respond here with how it goes, unless someone posts information to talk us out of it.
Another method of tying down the outside edges is to use screws–I think this is mentioned in the manual–but I’d rather not deal with filling and sanding all those holes. I’ll keep screws in reserve for a few spots that might not clamp well due to the angles involved, such as near the stern.
We expect install the deck within a month, and I’ll report back on this thread.
Marty
(not sure why the new site uses my last name, and I don’t know how to fix that)
May 21, 2018 at 1:11 pm #10138Keith Carew
ParticipantI had trouble with this step when I built my first boat. The result was that the epoxy adhesive squeezed out at the clamps more than between the clamps and the edge of the deck looks like there are small dimples all along. I solved the problem by making a batten to lay on the deck edge between the deck and sheer clamp. So when the clamps press down they are pressing down on the batten which then distributes the force more evenly beneath. You can make a batten form some rough stock although it is best that the surface in contact with the deck is flat and smooth. It is best if it is tall and not wide. So something like a 1×2 with the 1″ face against the deck. Hopefully, your clamps can open enough to fit over this batten.
May 21, 2018 at 6:33 pm #10142 Jeffrey WeeberParticipant
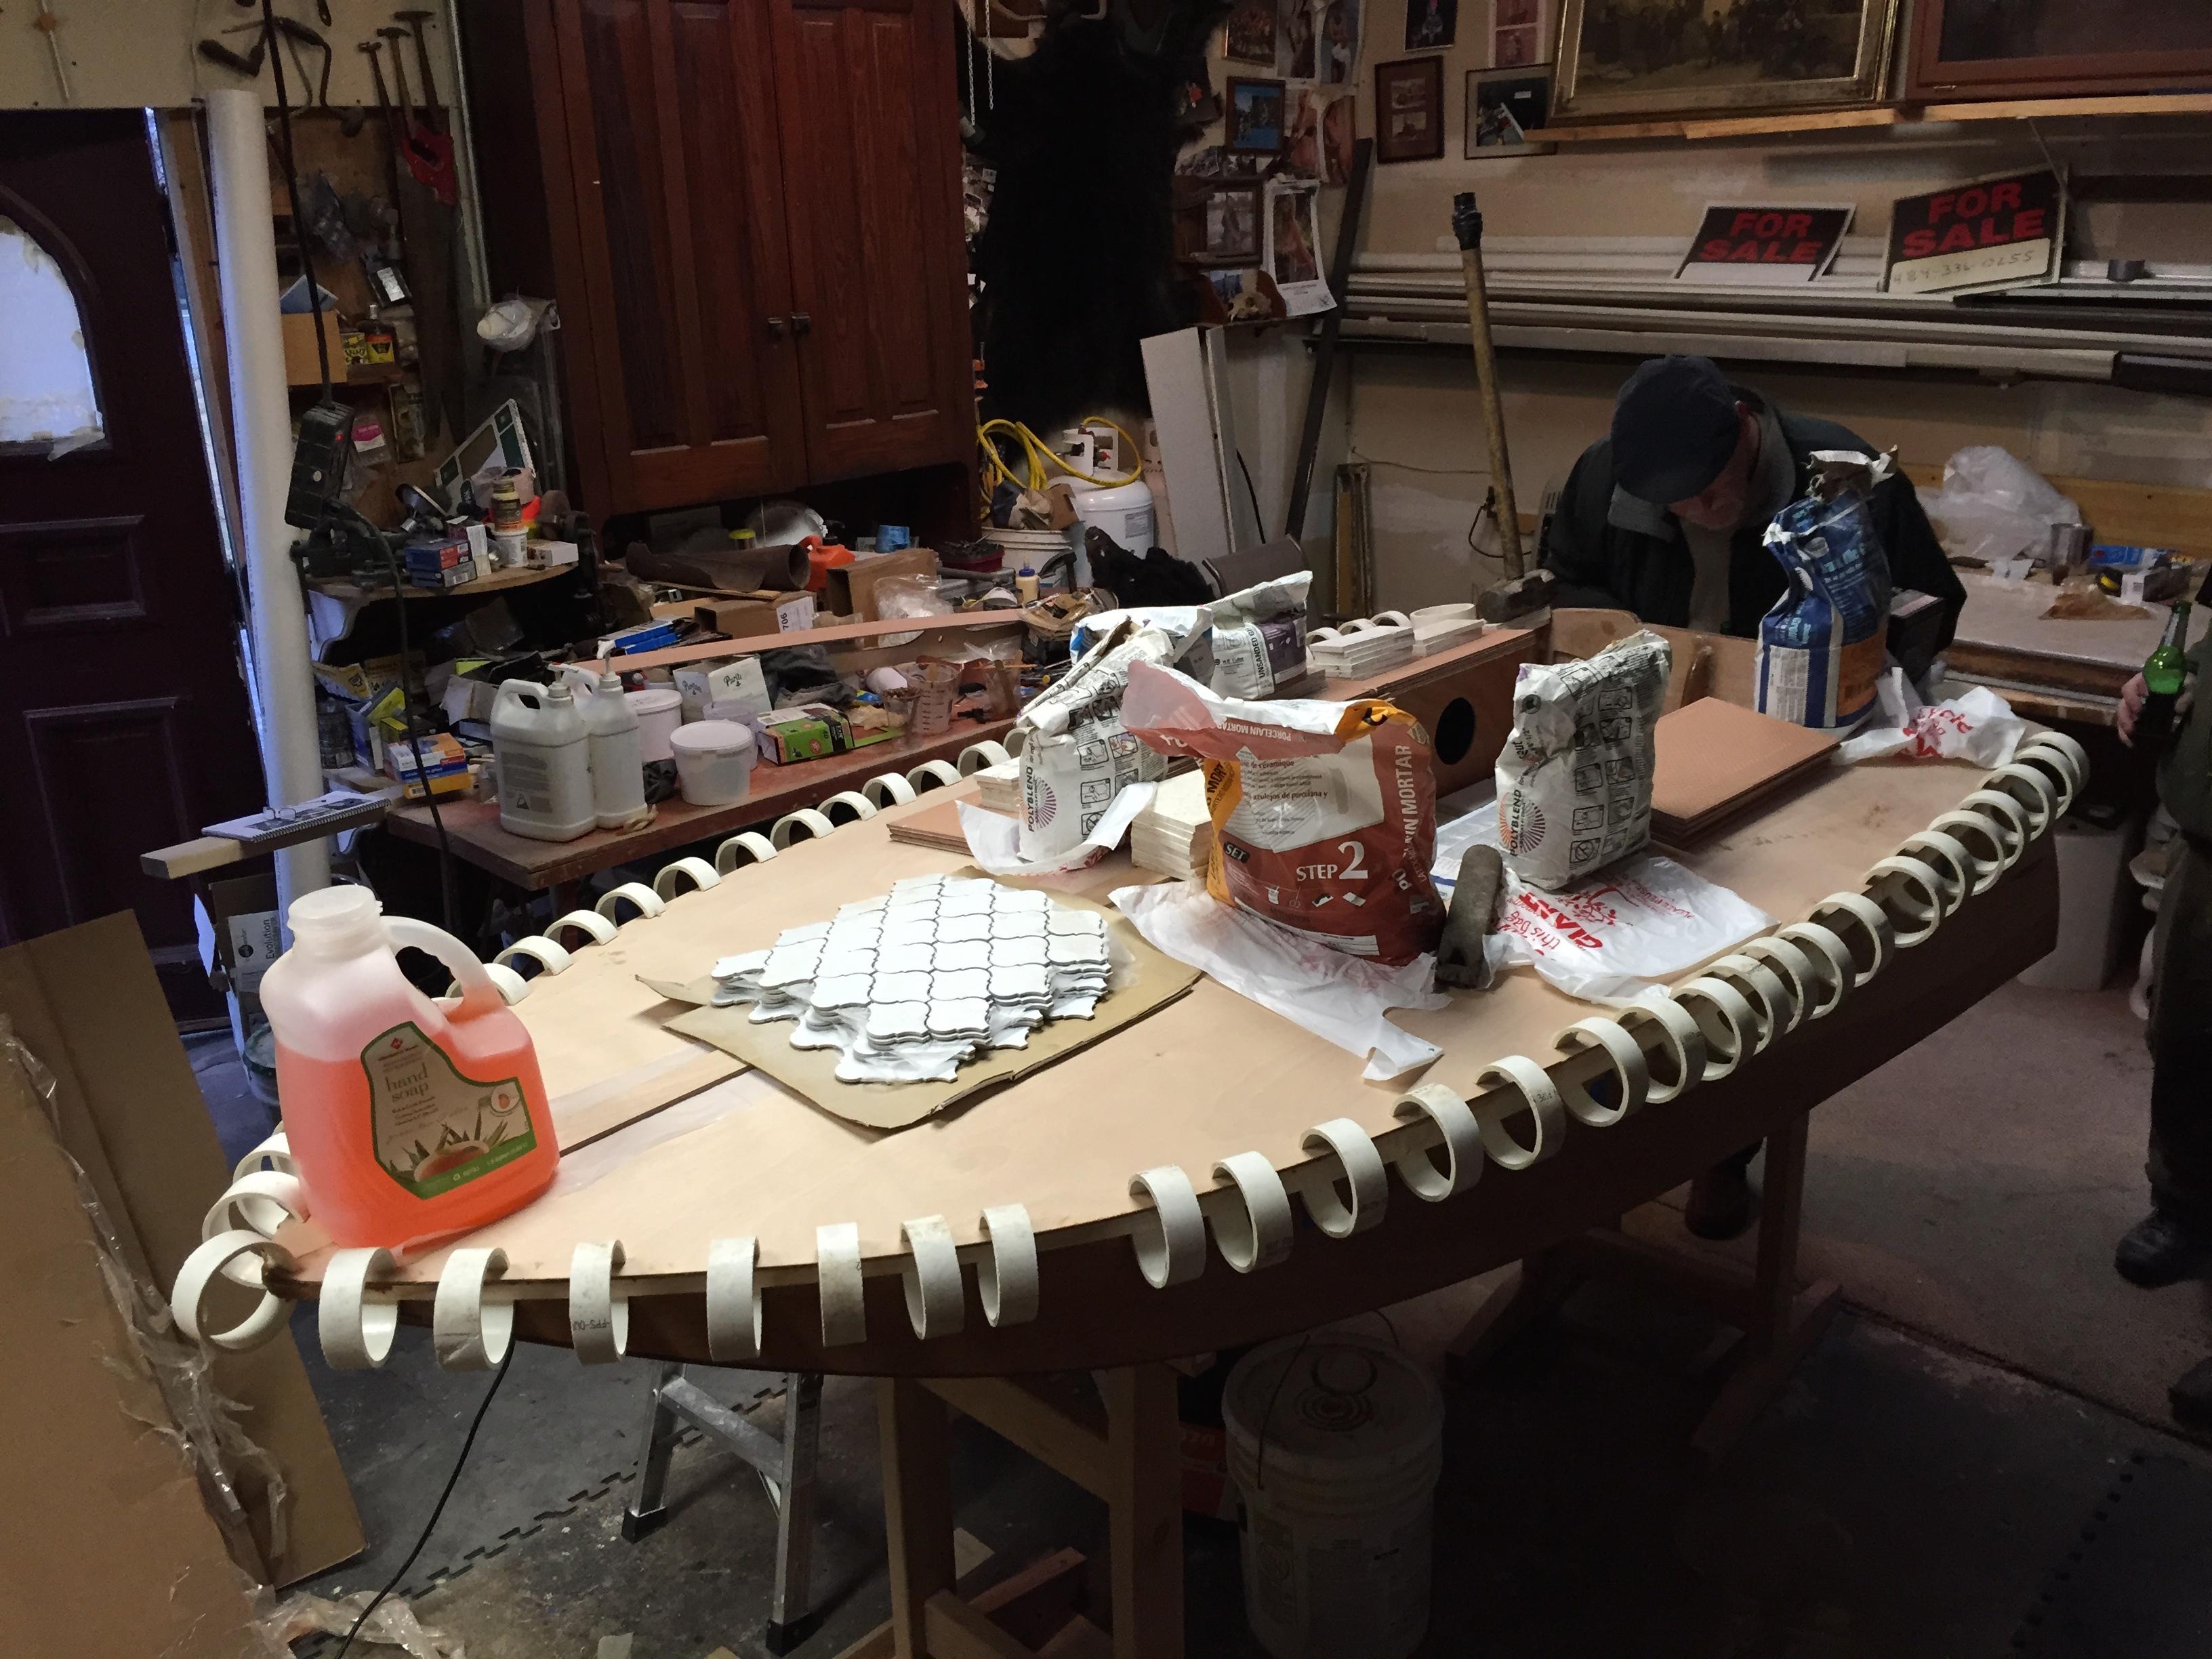
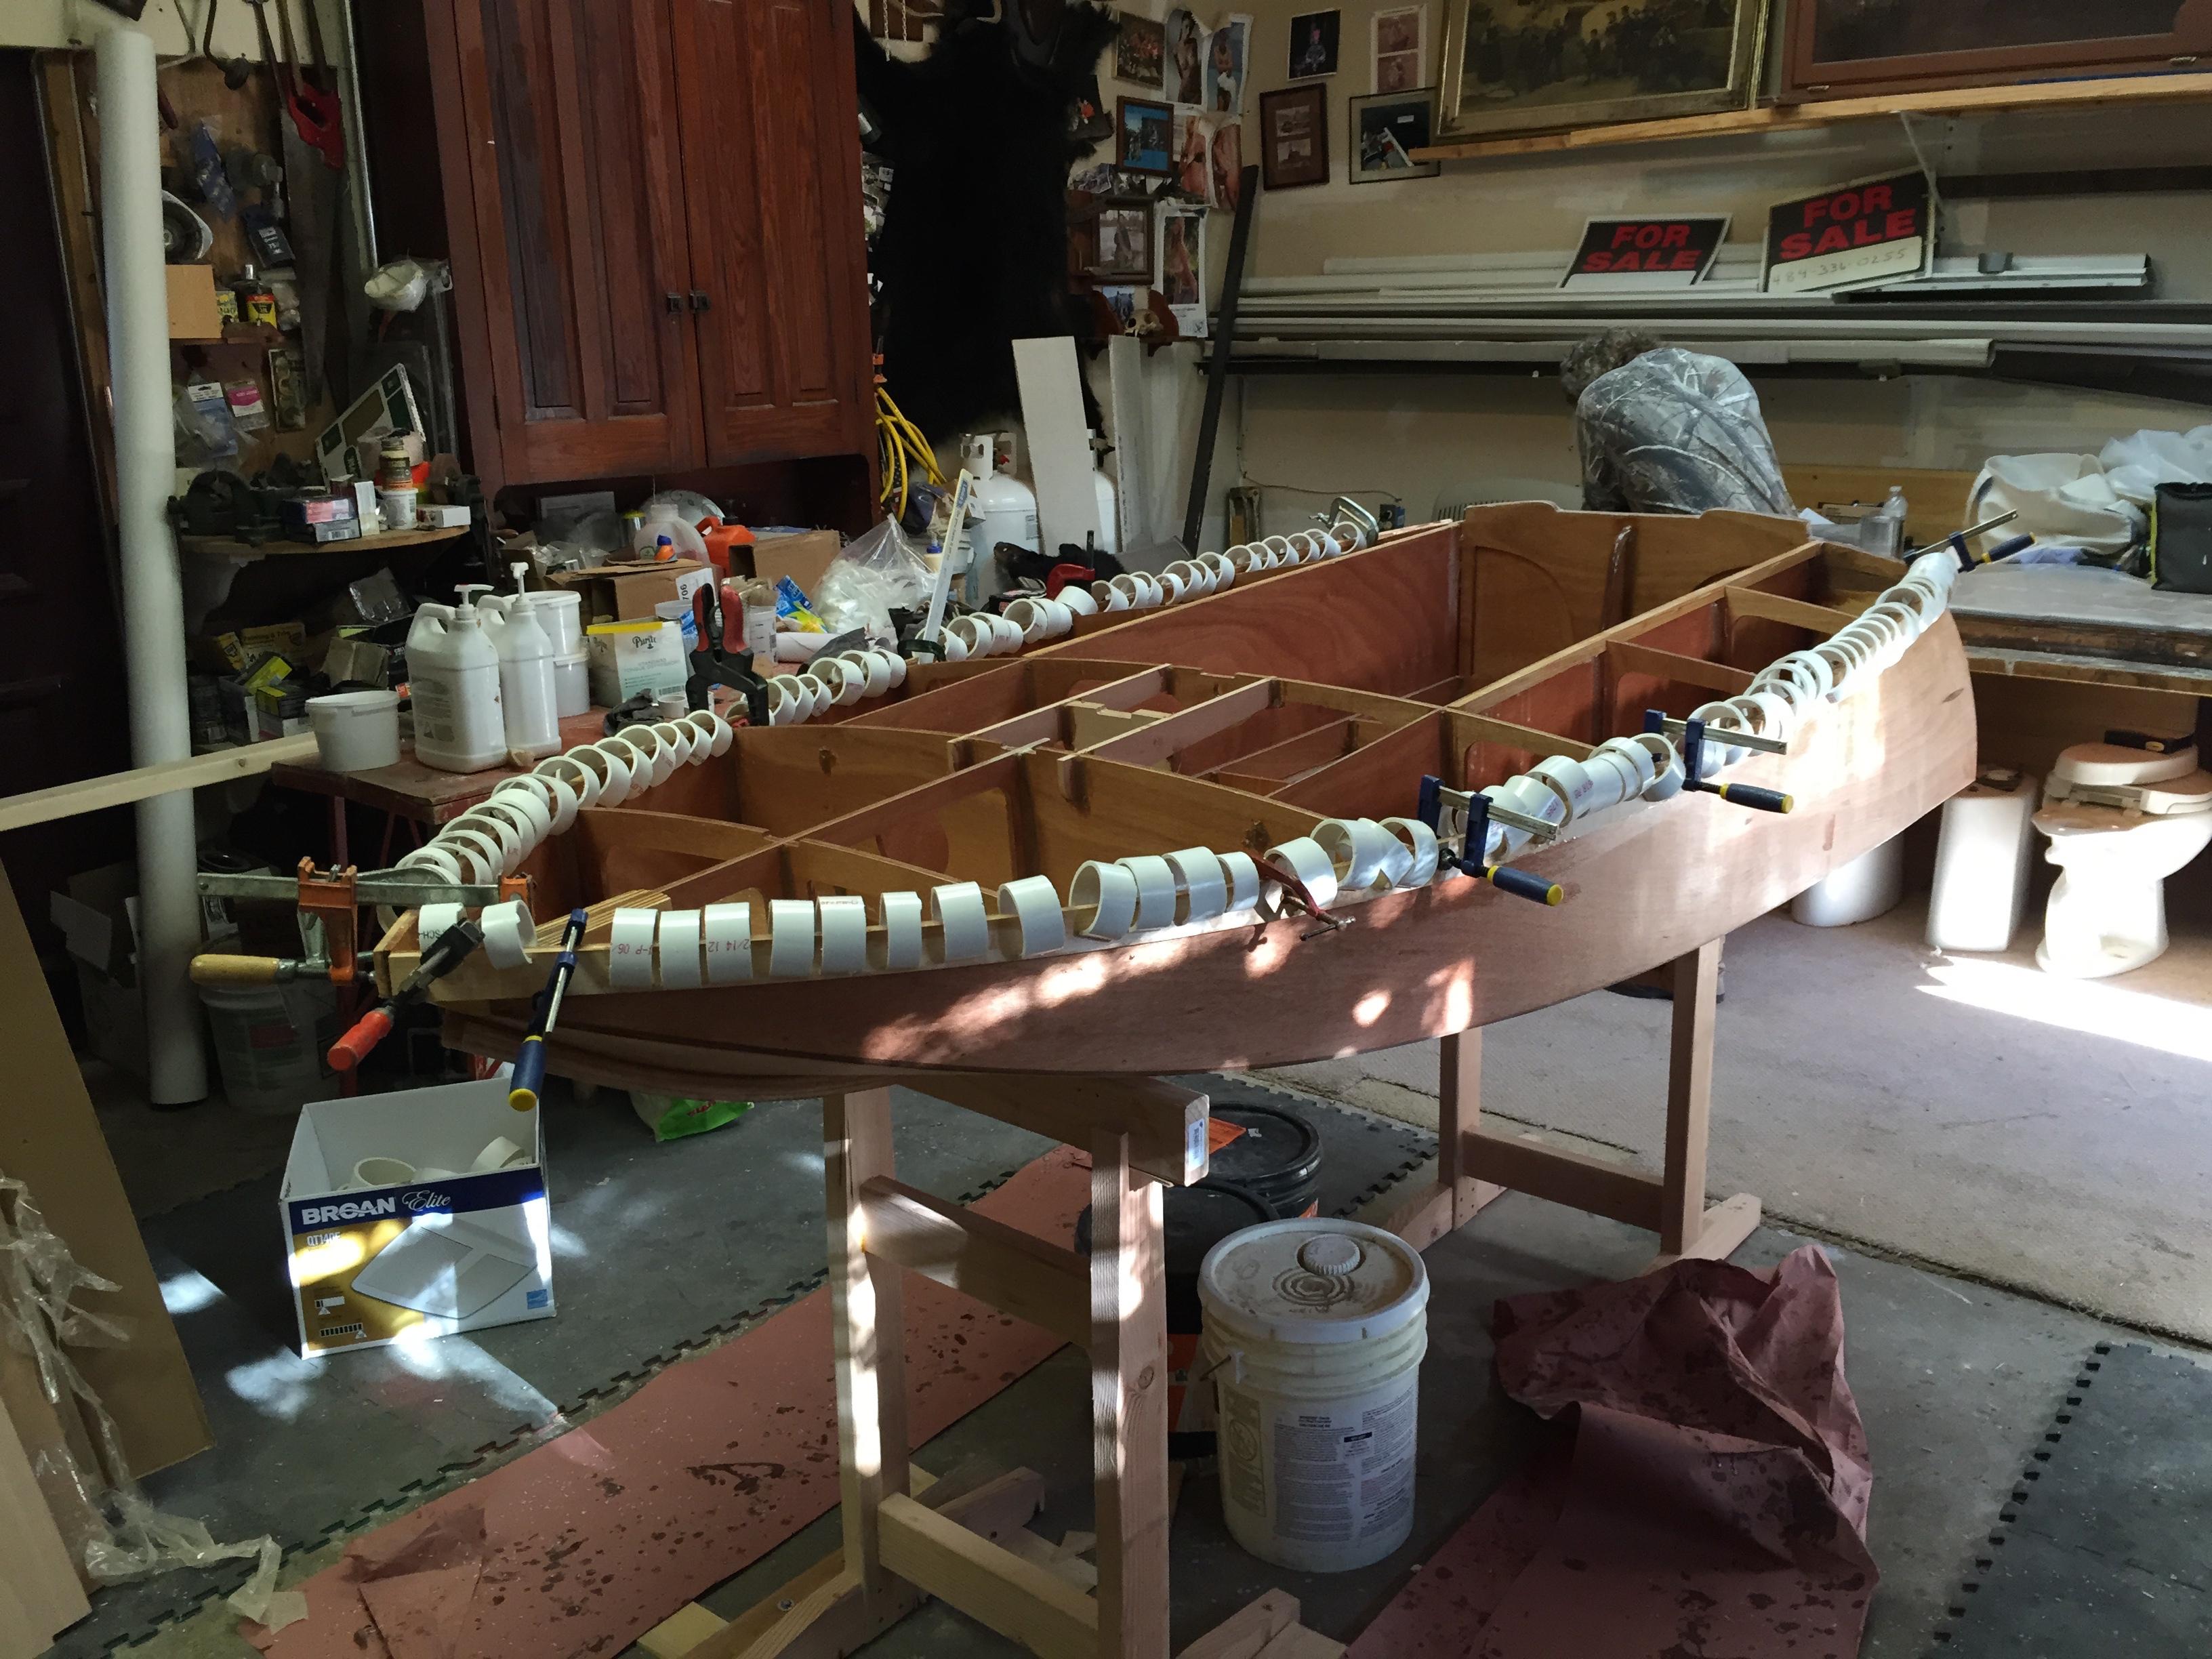
I actually used the PVC clamps and they worked out really well. I used them to install both the rails and the deck. I used varying sizes of pipe depending upon how far I needed to open the clamp. It was a simple and cheap alternative to spring clamps or C clamps. I did have to use some good C clamps for the rail, but did not need too many. When I installed the deck I also loaded up the deck with anything heavy that I could find. It looks pretty funny, but it worked. Here are some photos:

 May 21, 2018 at 6:45 pm #10143
 Jeffrey WeeberParticipant
By the way, I have a box full of PVC clamps that I would be happy to give to any builders out there who would like to have them.
May 22, 2018 at 5:40 pm #10148Marty Calon
ParticipantKeith, I like the batten idea, and it occurred to me to use them around the cockpit sides of the deck to even the pressure and maybe use fewer (temporary) screws. I guess that you had to cut shaped pieces to go around the outside edge of the deck?
Jeffrey, I’d be happy to borrow your clamps. Are you in the Central Maryland area?
Thanks for the advice!
Marty
May 22, 2018 at 5:43 pm #10149Keith Carew
ParticipantJeff:
Nice job with the clamps! That looks like it did the trick.
Marty, I think I was able to just bend the batten along the curve of the deck. I might have added some kerfs along the way to help that.
May 23, 2018 at 12:57 pm #10150 Jeffrey WeeberParticipant
Marty, I am in PA. I will be at Skuas on the Lehigh, and will likely be at Kent Island and Nationals and can deliver them to you in case you will be at any of those events and can wait that long.
May 29, 2018 at 1:34 pm #10184Marty Calon
ParticipantJeffrey, contact me on e-mail at mcalon at juno dot com with your address and telephone number. I will contact you with my information, to get the clamps from you or meet you at the Lehigh event.
I’ll continue the description of how we end up installing the deck here, with photos if I’m able to post them, in a couple weeks after we’ve done it. Prep work such as epoxying the underside of the deck pieces, etc will be done between now and then.
Marty
July 22, 2018 at 10:03 am #10352 RickKeymaster
Marty,
How did the PVC clamps work out for you? I will be joining my deck in the next week or so, looking for any feedback. I cut a 10′ length of schedule 40 3″ and another 4″ both into 1 1/2″ clamps. It looks like it will work well.
How far along is the project?
Rick
July 22, 2018 at 11:43 am #10353Marty Calon
ParticipantI broke my ankle right at the point where we were ready to attach the deck, so that’s where it stands until my cast comes off this week and I find out what’s next with that.
We looked at it and brainstormed and are still of the opinion that doing a half deck at a time will be easier and might even be more effective because we can clamp the area with the splice board. The splice board (“king plank”) is currently epoxied to the left deck half and we’re ready to attach it as soon as the underside gets a second coat of epoxy. We believe that a well-placed board and sufficient weights will work for the second half of the deck.
August 1, 2018 at 3:08 pm #10364Marty Calon
ParticipantWe’re ready to install the left deck half, hopefully at the next work session in a few days. I’ll continue the documentation in my other build thread.
-
AuthorPosts
- You must be logged in to reply to this topic.
