
Forum Replies Created
-
AuthorPosts
-
Marty Calon
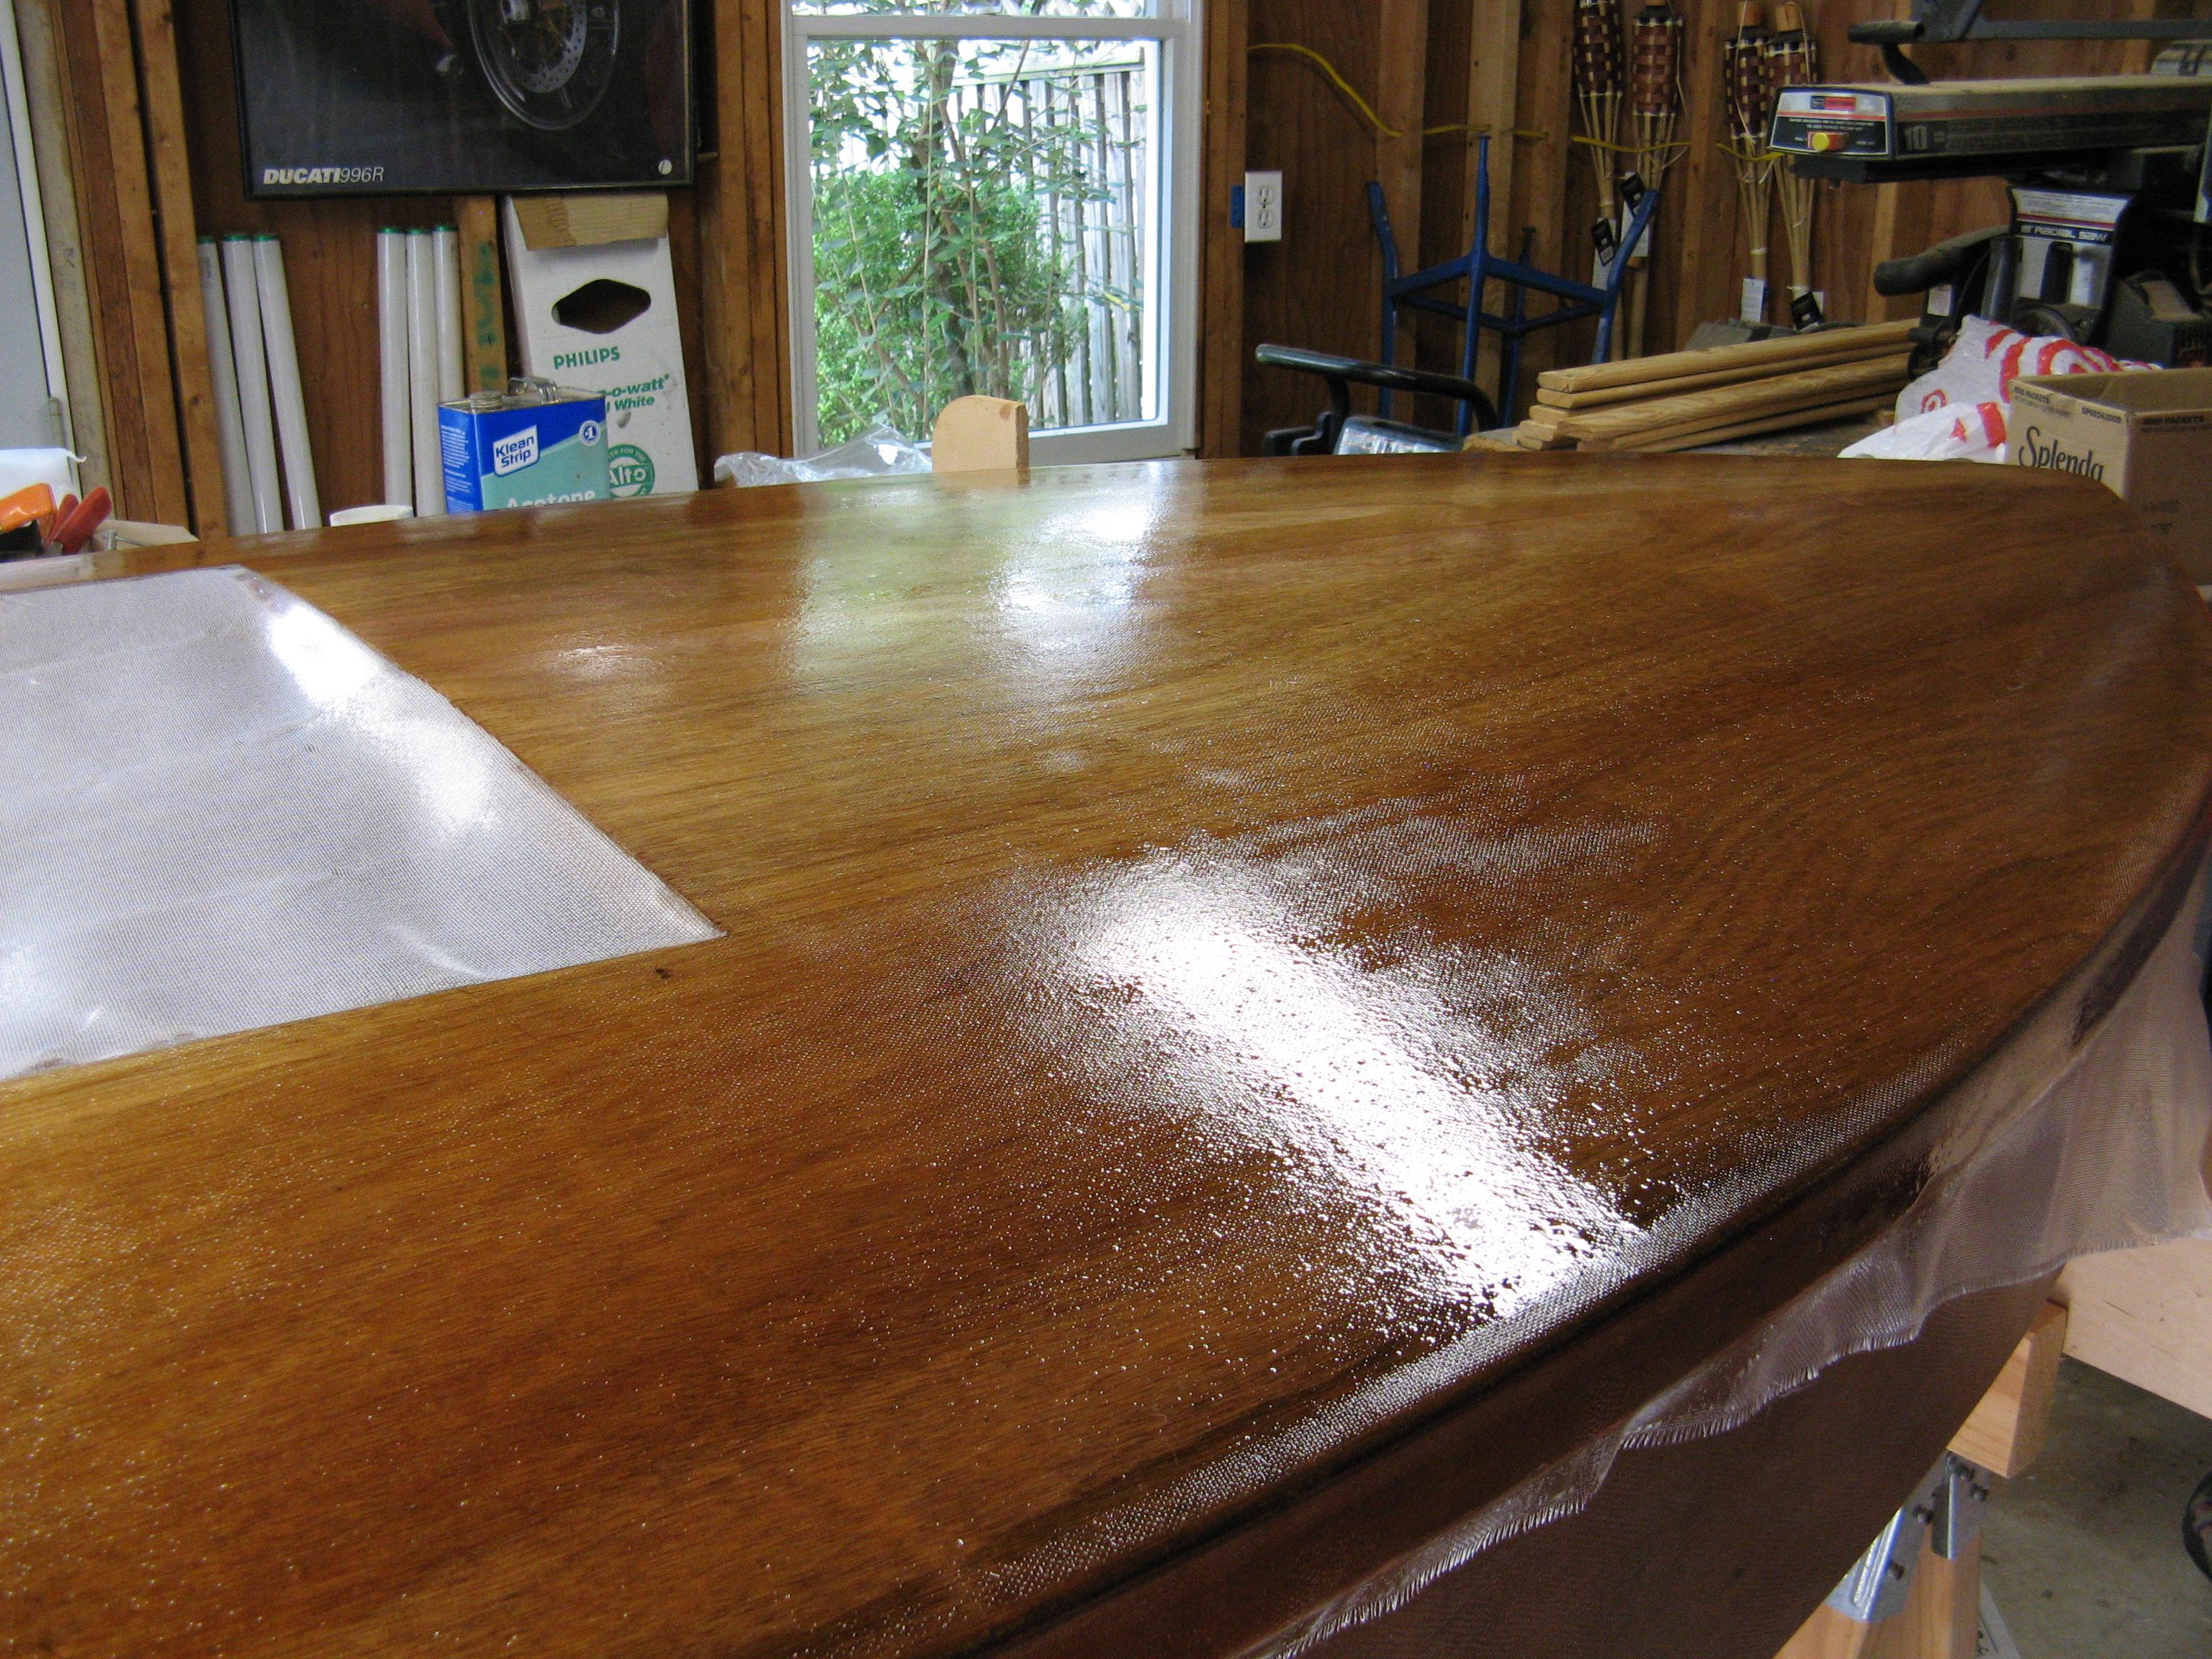
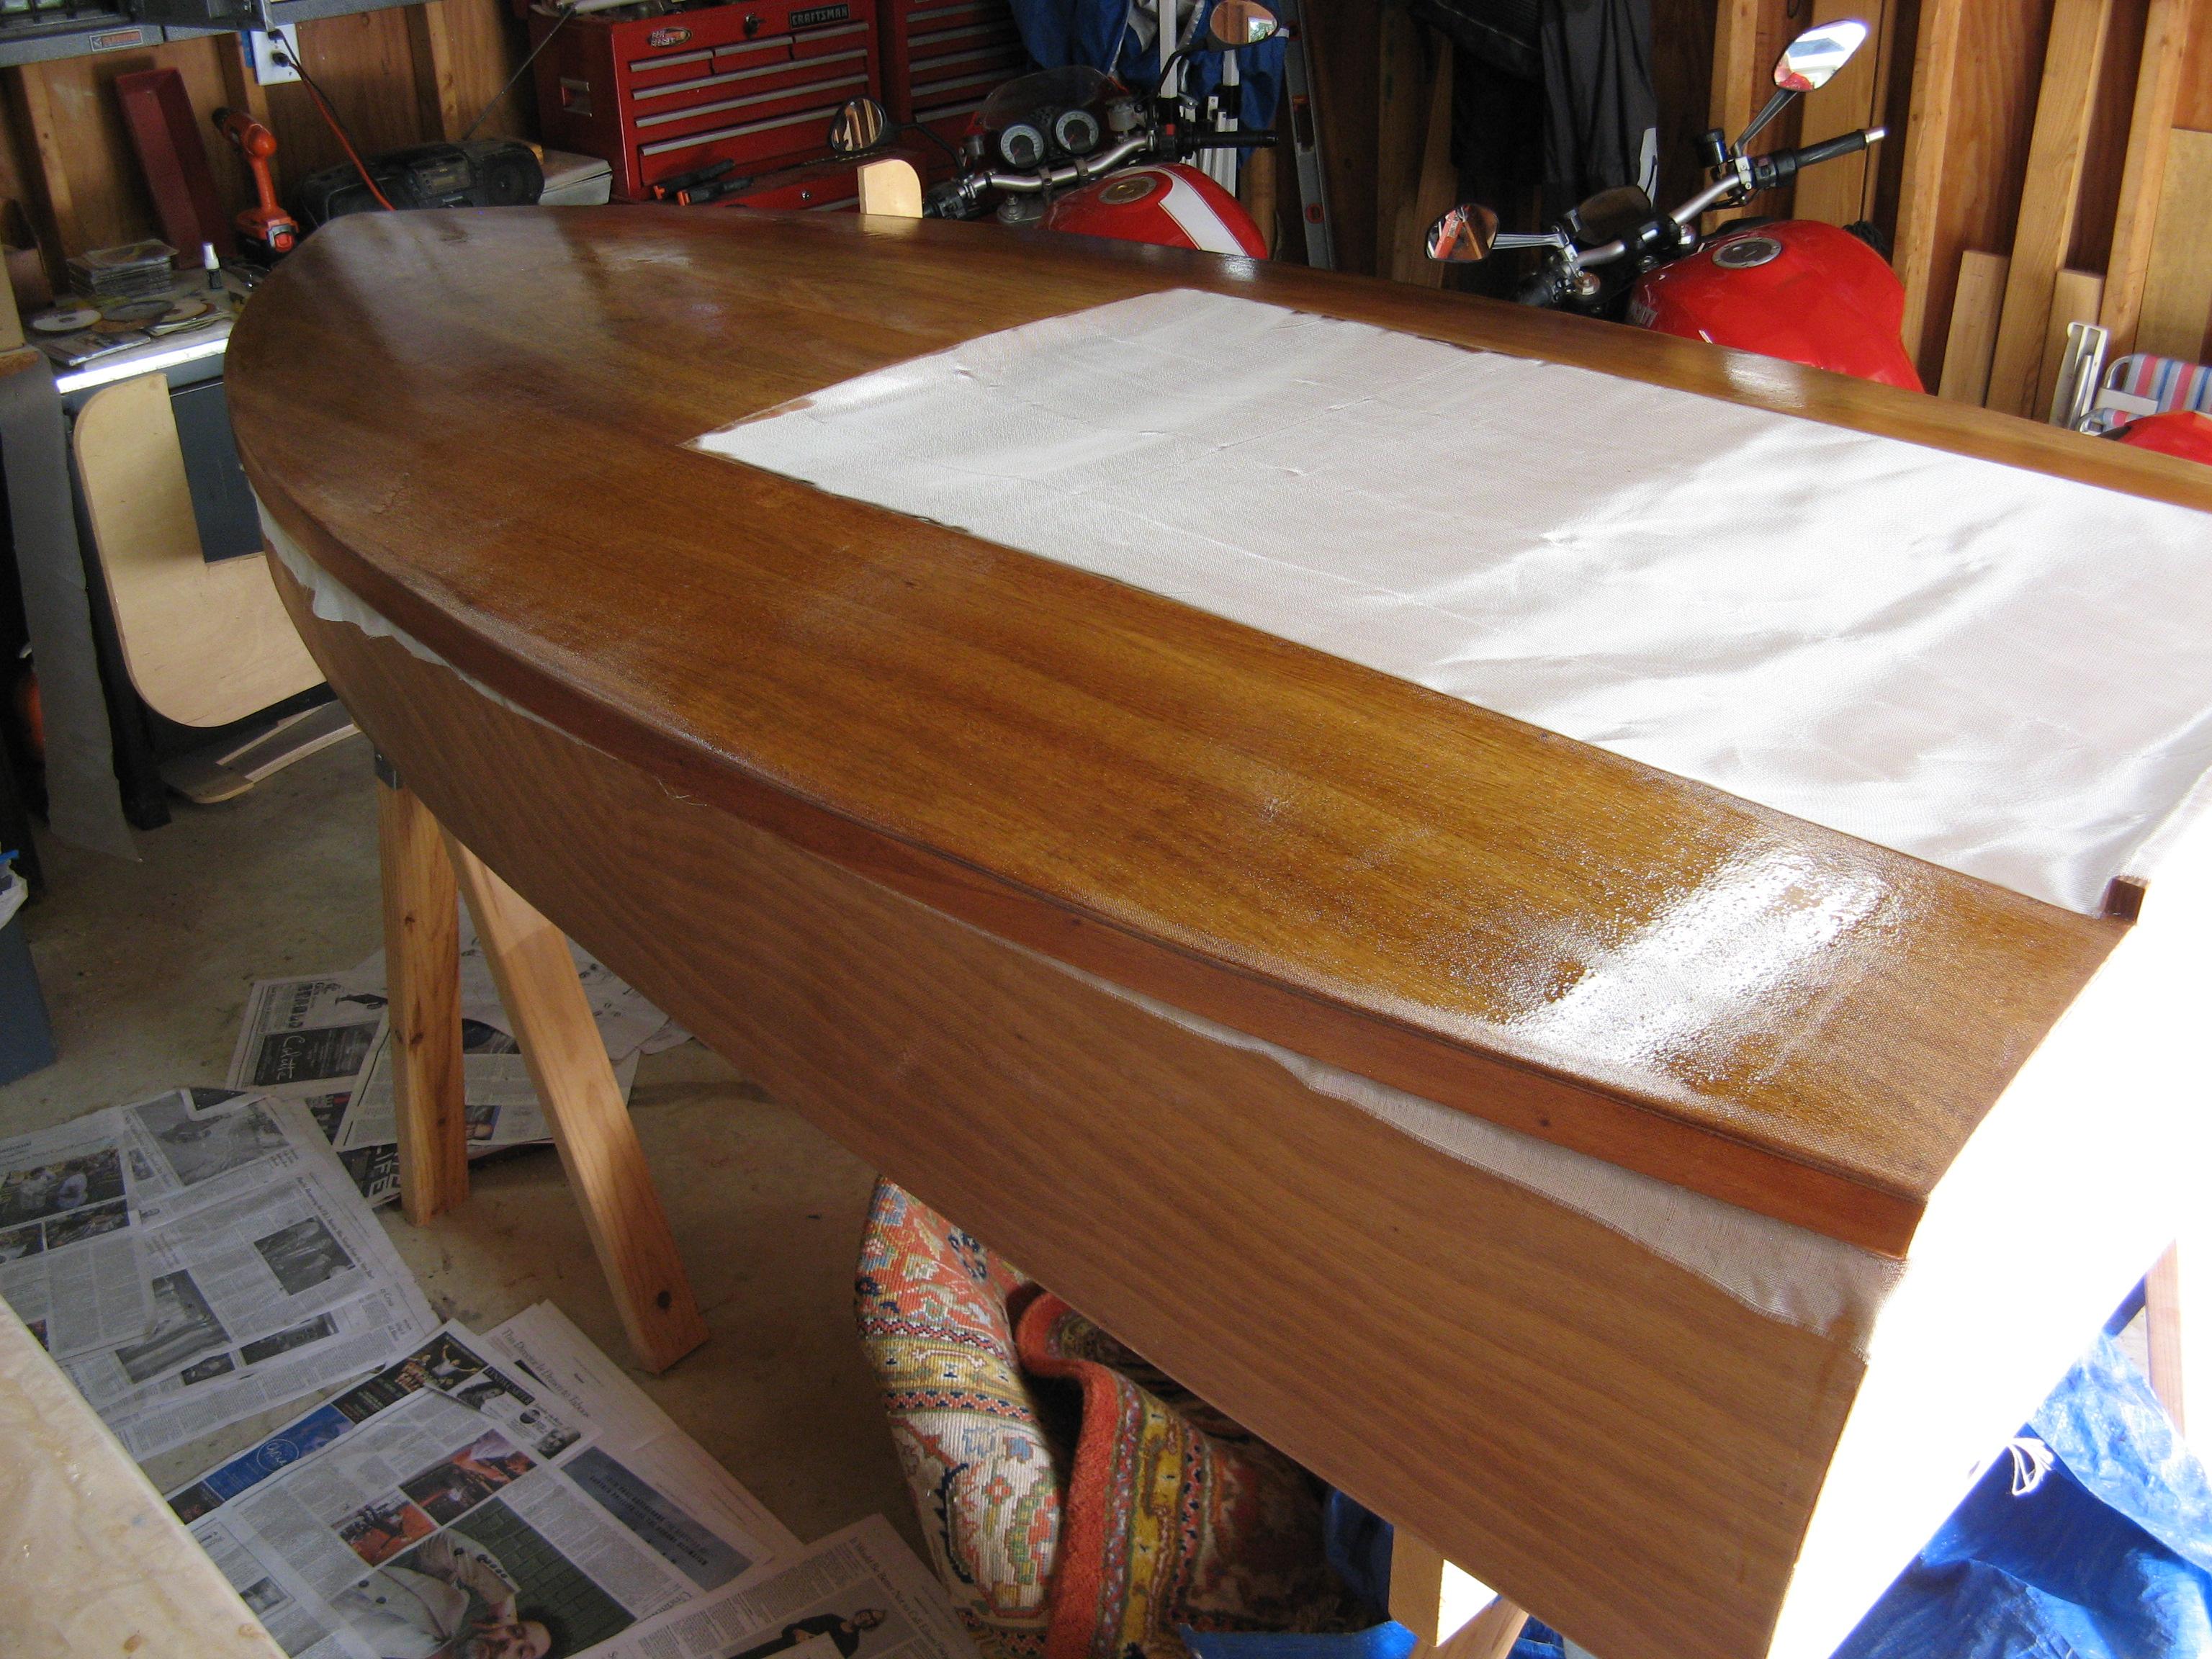
ParticipantToday we did some final sanding of the rails and the deck, thoroughly wiped off the dust, and applied fiberglass. No surprises, it went smoothly, but we had to take into account that the cloth is barely wide enough to get the edges of it to the bottom of the rails at the boat’s widest point. We used the “pour and spread” method of applying expoxy to the deck, and a 3-inch brush for the rails, as described in the manual.
To fit the cloth, we epoxied the main front part of the deck, then the left side to “hold” the cloth in place, then the right side. We had to maneuver the right side cloth into position and hold it there until it was epoxied (at the widest point), otherwise the sag into the cockpit pulls it back too far. It’s not hard to do, we just had to work with it.
I hope to sand the deck tomorrow if the epoxy has hardened sufficiently. There are areas that need to be leveled and smoothed. Then I’ll apply another coat of epoxy with a roller.
-
This reply was modified 5 years, 7 months ago by
Marty Calon.
ParticipantThat sounds like a good alternative for dealing with the stitches.
ParticipantGreat picture!
We found this to be the most tedious part of the construction process: cutting the fiberglass, doing all those fillets, and installing the fiberglass, all while bending down into the boat. The fiberglass panels will shed fiber all around the edges unless one is very, very slow and careful with the epoxying process, which we were not, for expediency’s sake.
ParticipantThat is a good point about the copper stitches. We had trouble with breakage too, and wound up drilling more holes and putting in more stitches in the “high-tension” areas. Your solution is more elegant and less sloppy!
If I had to do it again, I would use a heavier-gauge copper wire in those areas, maybe #14 or #16. I’d stay with copper because it should sand smooth easier than steel, which is probably the reason that these kits are supplied with copper wire.
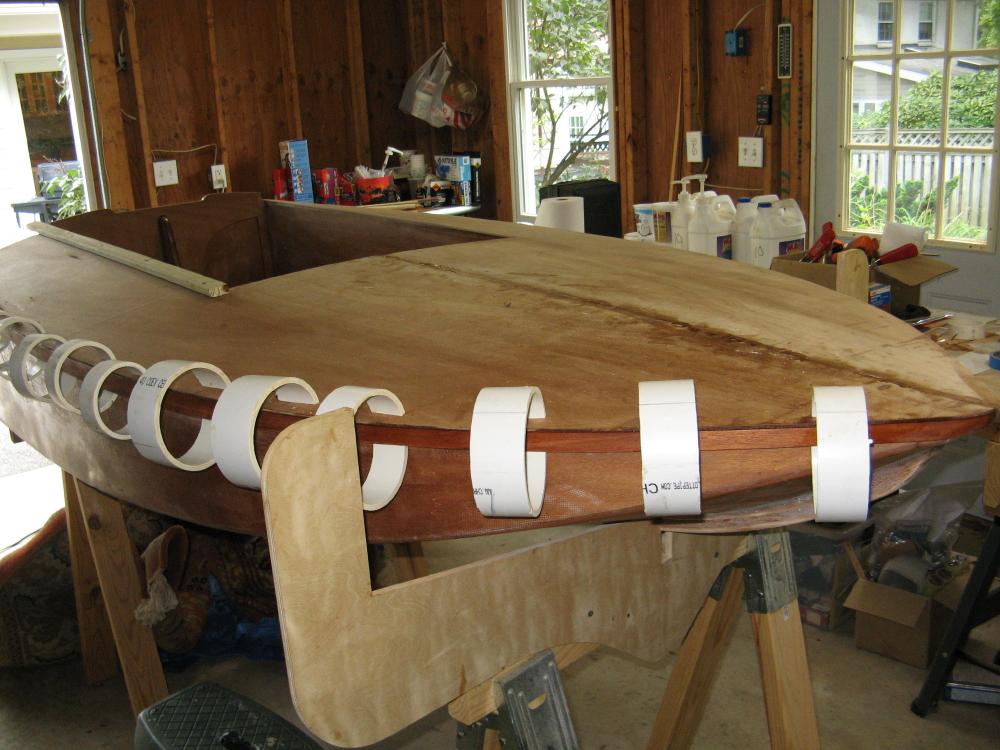
ParticipantYes, the PVC clamps were great. Thanks again!
Our friend Jim (whom I helped build a CLC Mill Creek kayak some years ago) is going to build a CLC dinghy for a friend of his with a big wooden boat, who would like a classy small wooden boat as his dinghy, instead of an inflatable. I will pass the PVC clamps on to Jim if he needs them for that project.
I haven’t mentioned that we’ve done much sanding of various joints and surfaces with decreasing grits, generally 80 for material removal, then 120 or 150 for smoothing. We do this as we go along with the construction, to keep everything smooth and ready for the next step. Much of this is hand-sanding, often with a sanding block, but we also use a power palm sander for larger areas.
An important point here is to change to fresh sandpaper frequently when sanding epoxy. It’s much easier to spend a few dollars on more sandpaper than to expend a lot of effort trying to sand epoxy with worn sandpaper.
We’ve also put a first coat of epoxy on the three coaming pieces, with special attention to the back (out-facing) sides and all edges. This is easier to apply now than to deal with after installation. As with everything else, these pieces have been lightly sanded after the epoxy set to get them smooth and ready for what’s next.
I’m fairly sure now that we’ll have this boat in the water next season. We hope to finish the epoxying of all the surfaces this season before it gets too cold, and do what we can in the winter with regard to hardware, painting, and graphics. The fiberglass cloth will be installed on the deck this week.
One thing we’ve wondered is if the hole for the kit-supplied threaded steering rod can stand up to the abrasion that will result from the use of the steering wheel. I’m thinking of installing a piece of 1/2-inch PVC conduit or copper pipe, whatever loosely fits the steering rod, to act as a bushing. Any comments on that idea would be appreciated.
ParticipantThe inside deck edges had some excess sawed off with the pull saw, then were sawed, flush-routered, and sanded to shape. Due to the afore-mentioned misaligned cockpit sides, both the left and right front ends and the right rear end of the coamings (rails) will have to “float” over the cockpit sides and some gaps where I cut away slightly too much deck will be filled with epoxy, as will the gaps under these rails. More about that later.
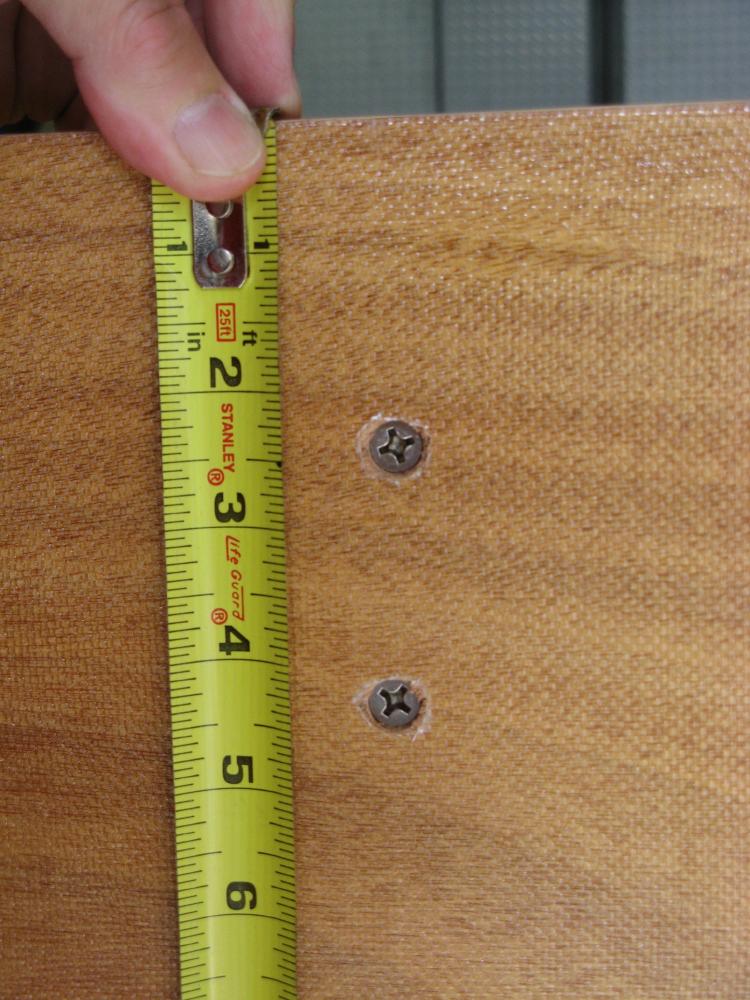
The screw holes have been filled with epoxy.

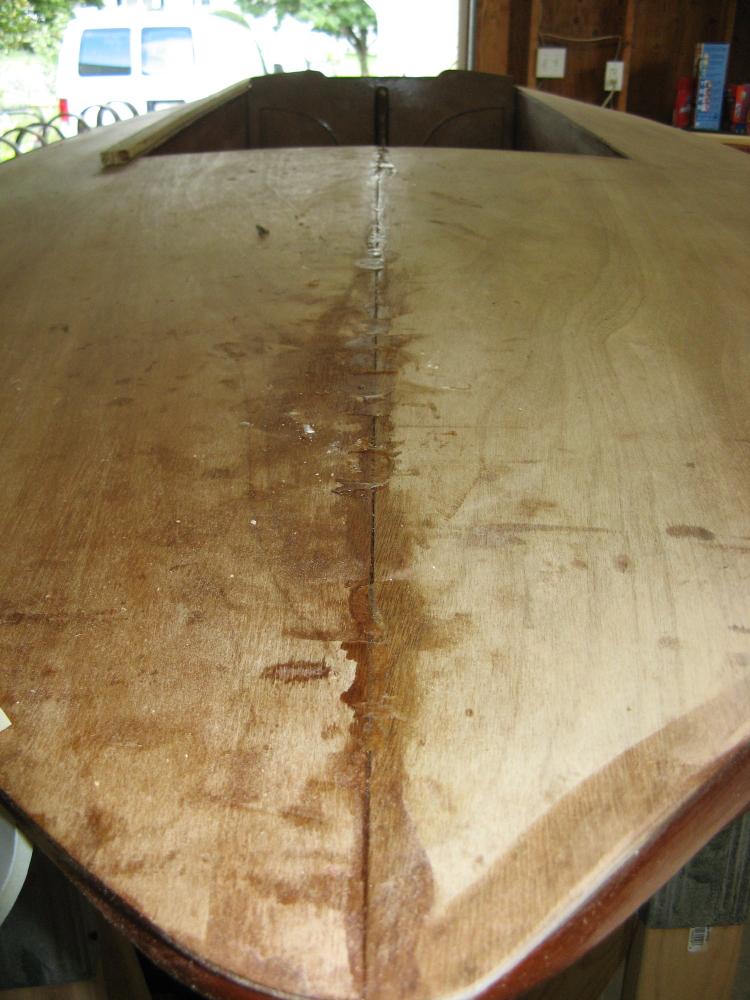
There were no surprises, including the consequence of installing it in two steps: a slight (one millimeter?) height difference at the seam. I expected this, and have dealt with it partially by sanding the high side, and then “skim coating” the low side with a thin layer of wood flour epoxy, sanding that down, and covering it with a layer of unthickened epoxy, which will also be lightly sanded before fiberglassing the deck.
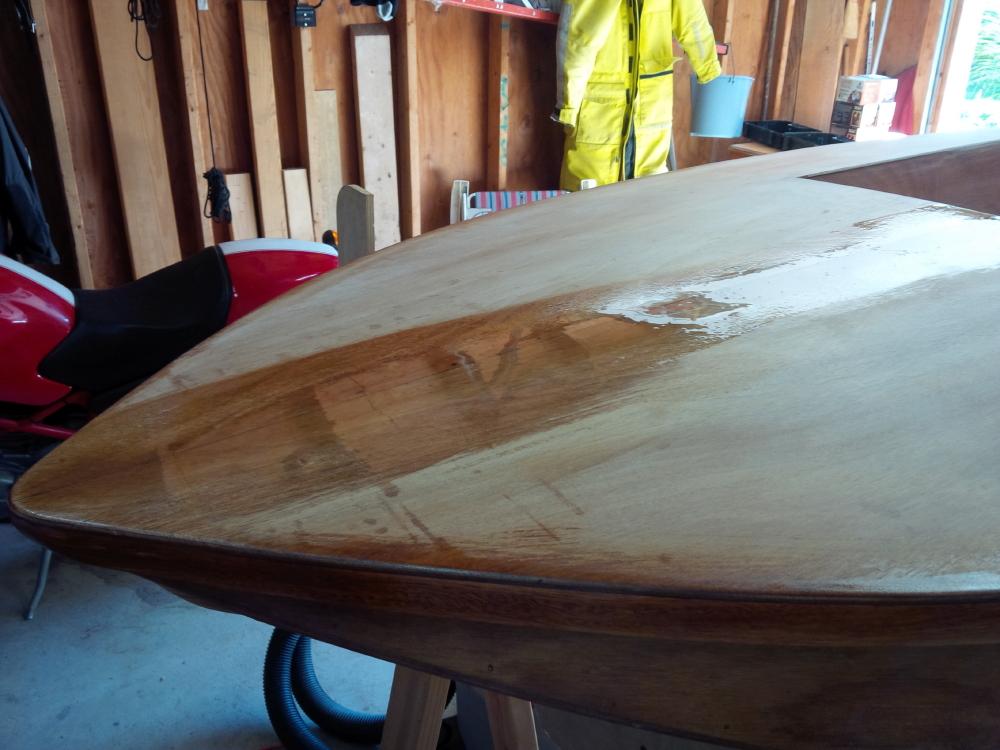
After applying the above clear coat to the bow seam, I applied a thin layer of leftover epoxy to the exposed end grain of the deck all the way around the inside and outside.
In between the deck work, we’ve been test-fitting, trimming, and epoxying the coaming rails, so they’ll be ready to install after the deck is fiberglassed.
The next work session will be some light sanding and cleanup, then fiberglass cloth on the deck as described in the instruction manual.
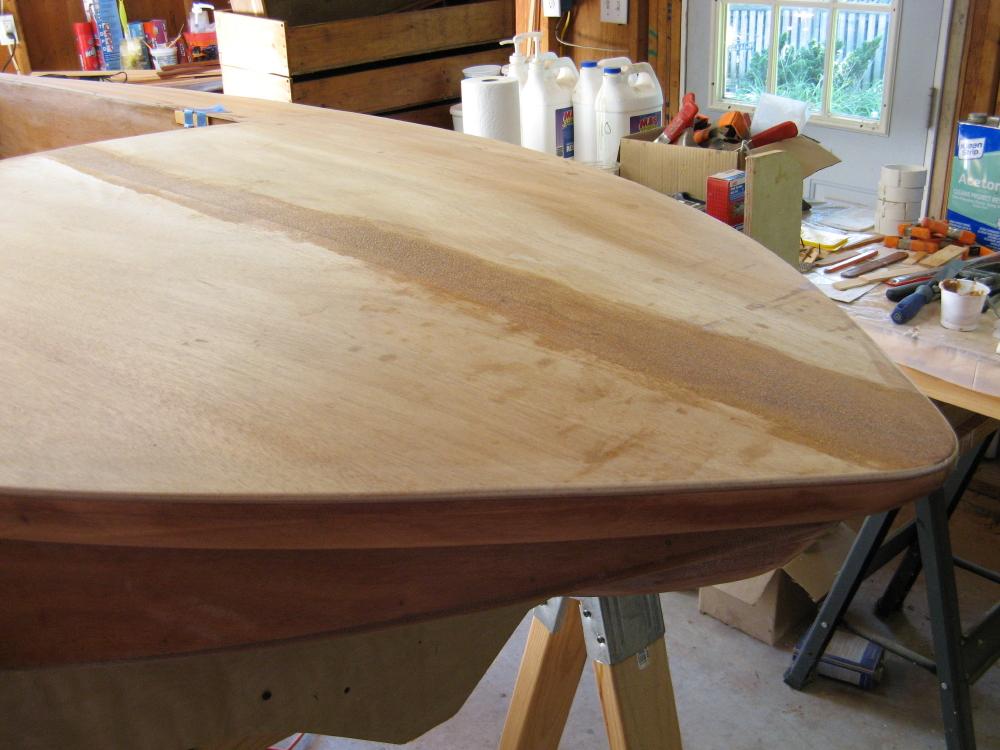
ParticipantDeck installation continues: As you can see from the picture above, the deck on the left side cockpit had to be trimmed straight rather than flush to the cockpit side at the forward 18 inches or so. We used the handsaw and then the flush-cutting router bit on the rest of it.
I gauged where the cut had to go by measuring and test-fitting the front coaming piece–it can be aligned with the steering hole in the frame–and seeing where the side coaming had to meet it. I also used a straightedge that is slightly shorter than the cockpit length, and the left coaming piece that will eventually be installed there. After some minor trimming of this piece, I was able to figure out where exactly it had to meet the front piece, and with the handsaw, I cut a straight line to that point. I’ll repeat this process later on the right side.
I got frisky with the handsaw and cut away a bit too much of the deck in one area for a couple inches (no pics at this time, I can post one later). When all is said and done, we think that this “hole” next to the coaming will be mostly covered with the epoxy fillet and possibly two millimeters or so of a filled-in area next to that.
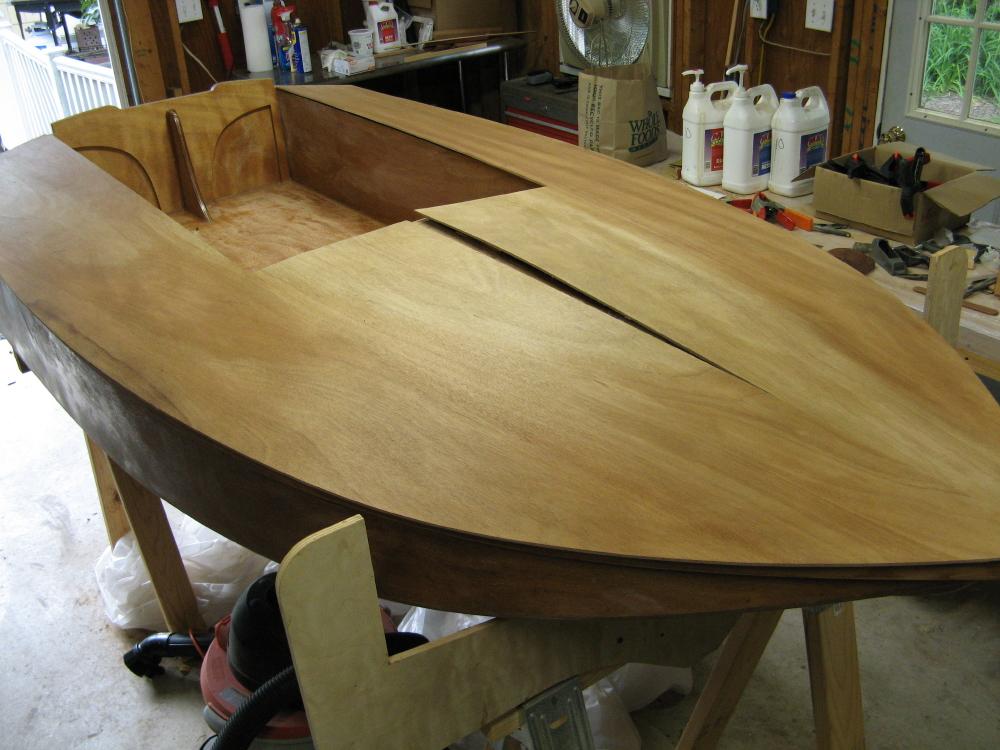
We installed the second (right) deck half separately, as discussed earlier, using a combination of screws and weights to hold it down at the seam with the left deck half. This did not result in a completely flush joint, partly because I used the thicker wood-fiber epoxy mix instead of the thinner cello-fil mix for the adhesive. Later, we will do what we can to disguise this.
If I were building another one, I’d install the deck as described in the kit instructions, in a single piece. I was intimidated by the scope of that job, but now I know what’s involved. Given the heat wave we had recently, which speeds up the rate at which the epoxy hardens–It was 95 degrees in the garage–I think that a one-piece deck install is best left for a cooler day. Our second deck half went in at temperature in the low 60s, which gave us plenty of time to work the epoxy, align everything, etc.
Pictures below show the second deck half and the squeeze-out mess at the seam of the two deck pieces after the screws and pads were removed. I’ve already mostly sanded away the excess epoxy and some of the high-side wood, but I don’t want to remove any more wood.
We used several methods to trim the outside of the left deck half. Jack used a belt sander to remove most of the outside overhang, and I followed that with a sanding block to make it flush and round it. I had a quarter-round router bit and we tried it on a few inches, but we weren’t happy with the result. It’s not a true right angle, so the bit doesn’t align quite right. The hand sanding block with 80-grit rounded it fast enough, since the overhang had already been removed.

-
This reply was modified 5 years, 8 months ago by
ParticipantBest of luck to you! Read my build thread and learn from our mistakes!
ParticipantWe’re currently trying to decide when to install the bow thruster controls, probably later when the other controls go in.
We forgot to obtain and install the deck plate in the hole up front, wound up looking all over for it when it seems that we didn’t actually buy one at all. I’ll get one and do it before the right deck goes on. It’ll be a more tedious job that way. At least we still have some access from the right side.
We have an issue with the cockpit sides. They’re not straight, especially on the left side. Most attention during construction was directed toward the outside lines, and, not having built one of these before, we didn’t pay much attention to the inside lines. Luckily, they curve slightly outward, so we can work around that.
The intention is to install the cockpit rails straight and where they should be, not just for appearance but because they need to meet up nicely with the rail section that goes across the front.
I think that the rear half of each cockpit side is straight enough to trim the deck flush to it, but the front half will need more work. This means that the deck must be trimmed to result in a line that is in the correct place, resulting in some deck overhang over the cockpit sides.
The rails will “float” on the edge of the deck and have to be secured in place, maybe tacked with some epoxy, a corner clamp, whatever else we can figure out, and then we’ll set the boat on its side and fill in the gap behind each rail with thickened epoxy.
I intend to figure out the line where the left deck should be trimmed and do it before we install the right deck. This way, we can test-fit the rail pieces properly, so we know exactly where to trim the right deck after it’s installed.
I’ll take some pictures of this process and post them after we do it.
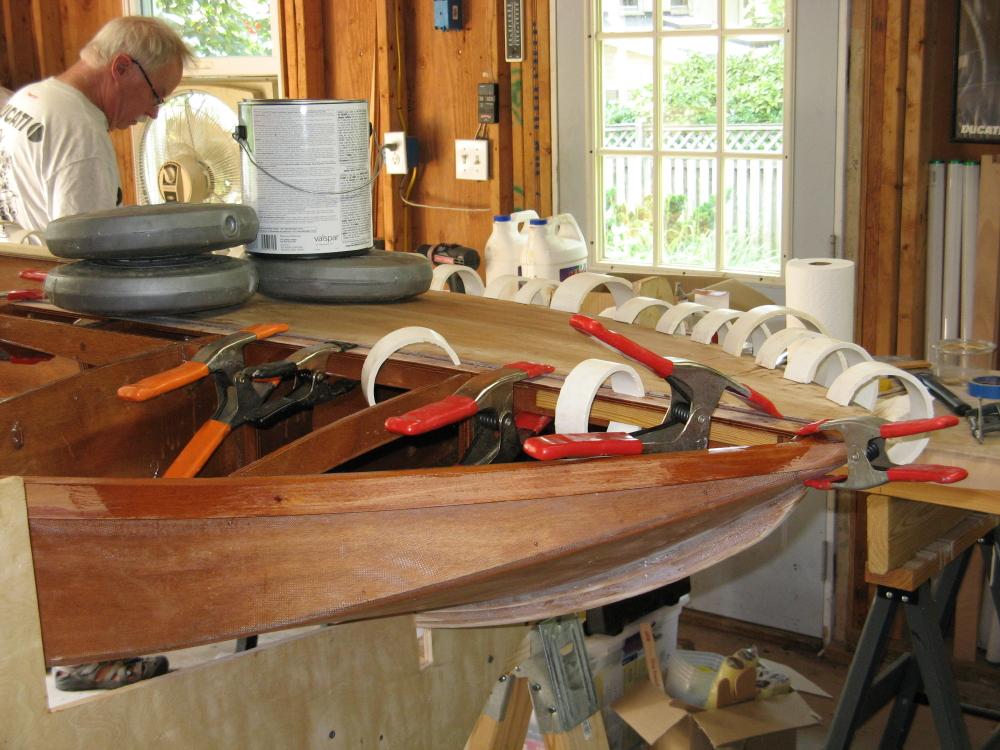
ParticipantLeft deck half was installed today without any surprises or problems. We used the strip of wood on the cockpit side to reduce the number of screws and provide more even pressure along that side. It’ll come off in a day or two:

Here is a shot of the two screws I installed at the upper end of the transom brace:
It looks like it’s almost ready for a day on the Bay:
 Participant
We’re ready to install the left deck half, hopefully at the next work session in a few days. I’ll continue the documentation in my other build thread.
ParticipantHere are some photos of the above-mentioned work.
The transom brace. After hearing some stories of how the brace has become disconnected on some boats, today I added two large flathead stainless steel screws, about #12 x 2 inches, from the back, near the top of the brace. They are countersunk about 1/8 inch and the hole will be filled with epoxy. I don’t know how much this will strengthen the arrangement, but it can’t do any harm:

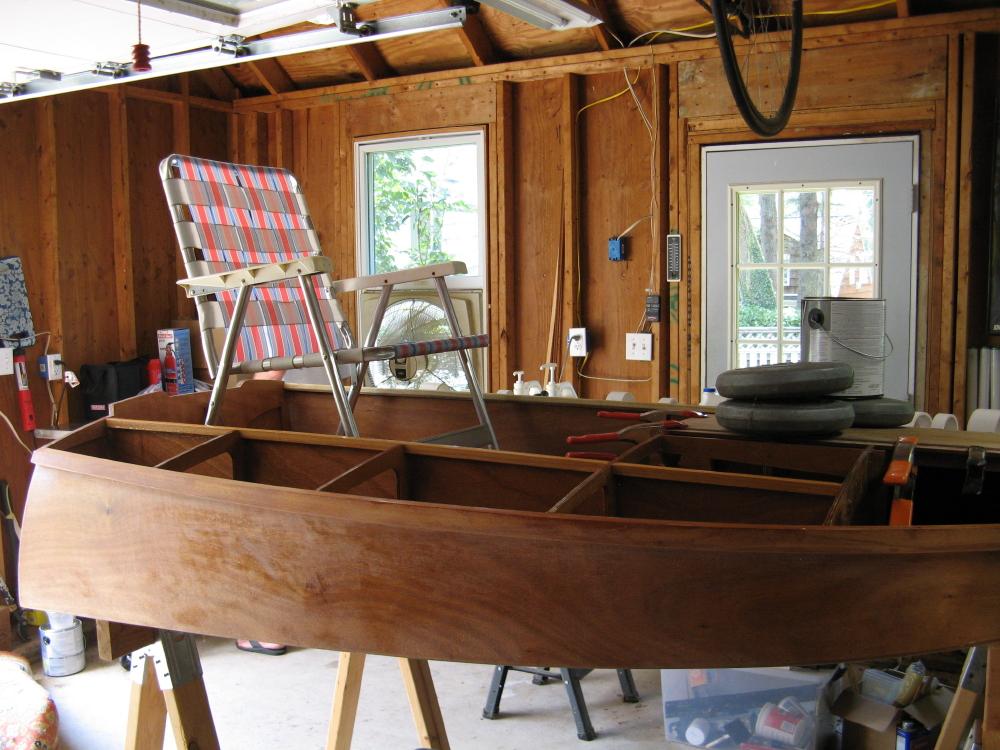
An overall shot of the hull with deck pieces sitting on it for test-fitting:
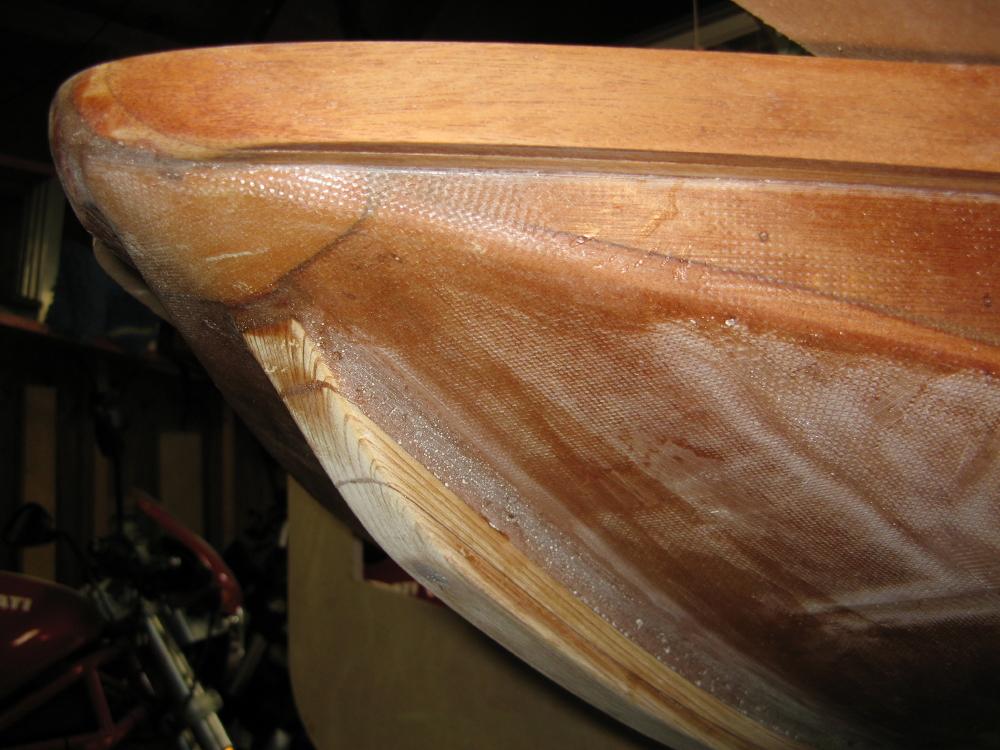
The bow and tapered keel. The rail height is tapered somewhat toward the bow, but it’s not noticeable in this picture:
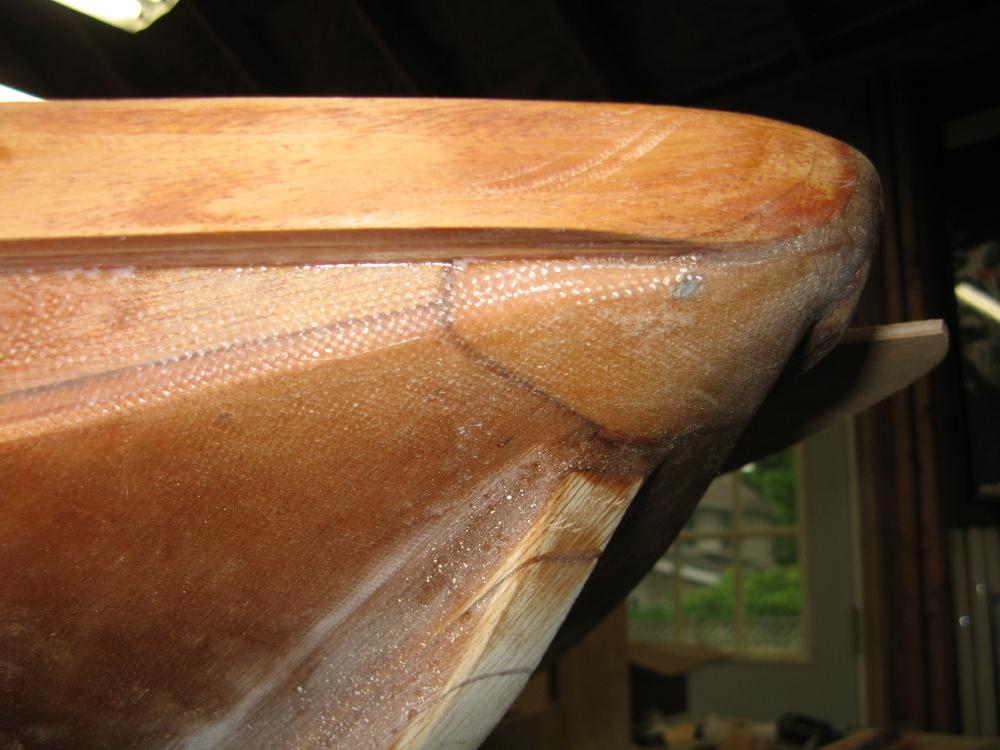
The keel had to be tapered more abruptly than we would have liked, because of the broken-off screws mentioned in the previous post. We had to leave enough wood to “bury” the screws under some epoxy:
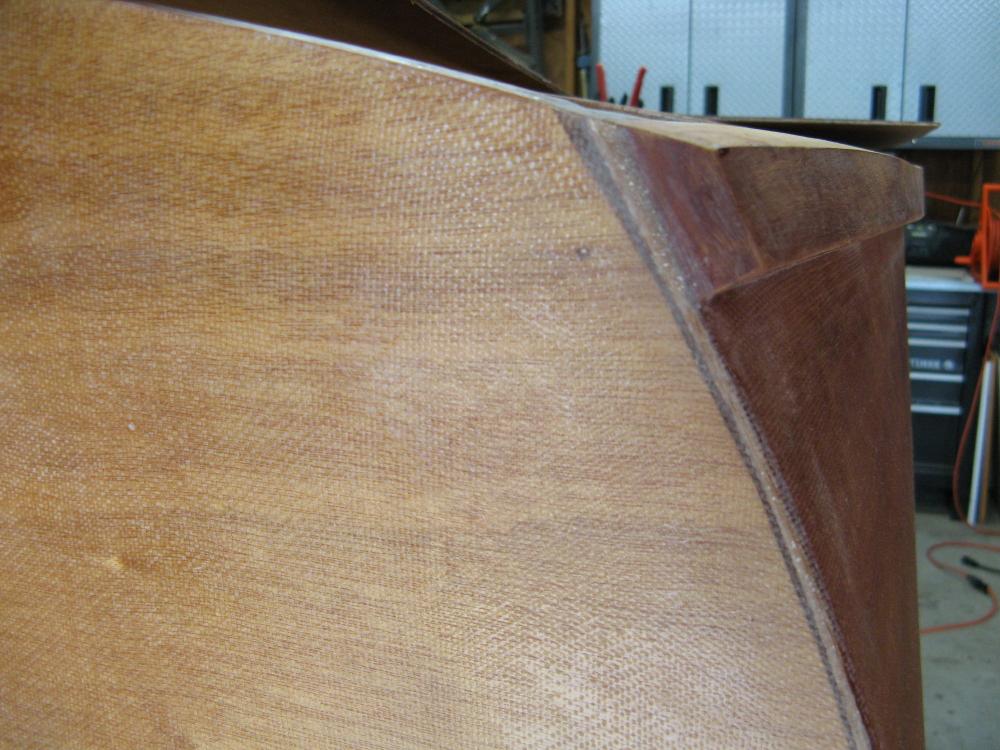
A view of the trimmed outside rail from the back:
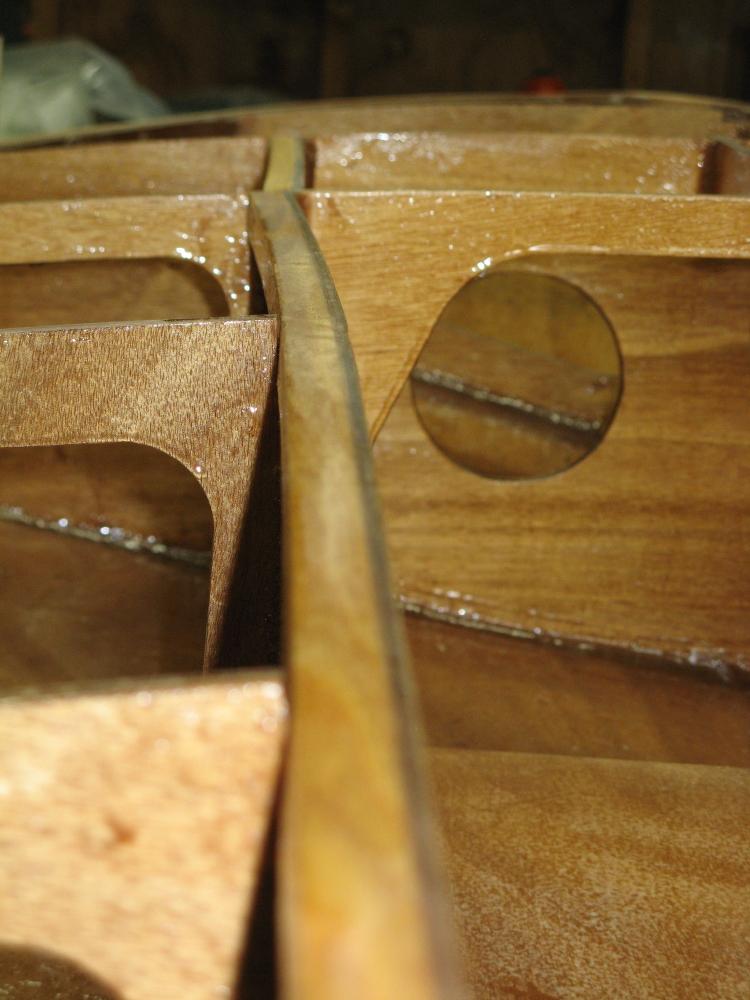
A view of the bracketry for the steering mechanism. The vertical piece in the center was installed with epoxy and a stainless steel screw in each end to hold it in place until the epoxy set. I countersunk them and filled the holes. All the notched areas for the deck splice plate had to be heavily cleaned and trimmed to make a good fit:
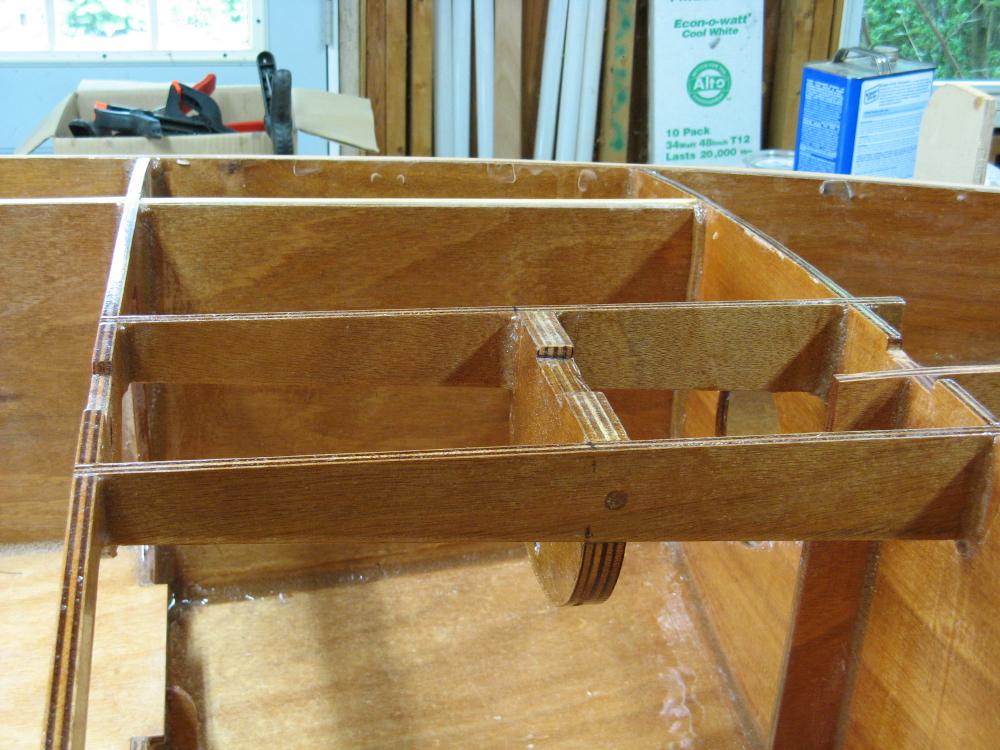
We decide to add wood strips (leftover carlin material) to the frame behind the bow. This is to provide additional strength for the bow handle that will be screwed into this area. As a bonus, it also provides more mating surface for bonding the deck:
I started another discussion about installing the deck, whether to do it as a single piece per the kit instructions, or one side at a time. After much discussion, we decided to do one side at a time. After some test fitting and alignment, we epoxied the splice plate to the left deck half:
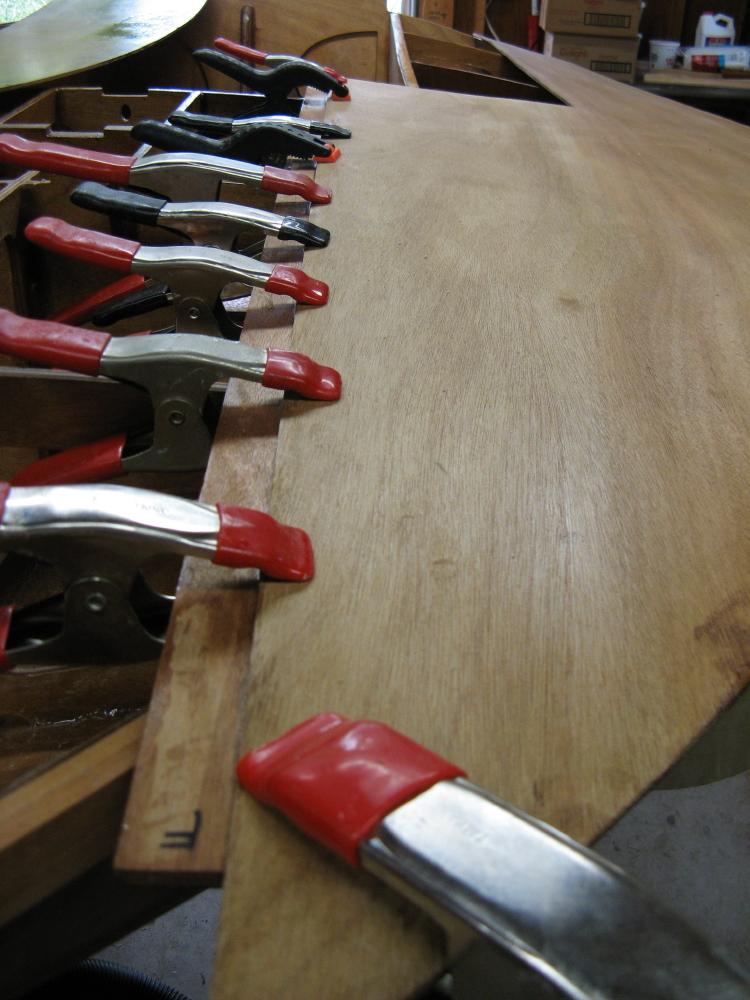
We spent a few hours today discussing and setting up for the deck installation. We’ve coated everything that’s going to be covered by the deck with epoxy, as well as the undersides of the deck pieces. Jeffrey has generously given us a large box of his custom PVC clamps and we dry-fitted the left deck half today and clamped it. It looks good for fit and alignment. Jack will vacuum out and clean up the spaces that will be covered permanently, and we’ll resume construction in a few days.
ParticipantI broke my ankle right at the point where we were ready to attach the deck, so that’s where it stands until my cast comes off this week and I find out what’s next with that.
We looked at it and brainstormed and are still of the opinion that doing a half deck at a time will be easier and might even be more effective because we can clamp the area with the splice board. The splice board (“king plank”) is currently epoxied to the left deck half and we’re ready to attach it as soon as the underside gets a second coat of epoxy. We believe that a well-placed board and sufficient weights will work for the second half of the deck.
ParticipantHere we are again, after the web site change. Jack and I have done the following:
- Installed the transom brace.
- Built up the fillets in the the hull as described above.
- Fiberglassed the exterior of the hull and the transom.
- Installed the keel according the current requirement (12 inches short of the back).
- Installed various brackets and deck braces in the front.
- Extended the carlins with short pieces between frames 2 and 3. If we did it again, we’d notch frame 3 and extend the carlins as single pieces all the way to frame 2, but doing it with short pieces is still better than not doing it. It’s more support for the deck.
- Installed the side rails.
- Tidied the nose of the boat where the rails meet.
- Epoxied and installed the cockpit floor.
- Filled holes and epoxied various areas that need it before they are covered by the deck.
Some comments below. I did not take photos because this thread had disappeared, but I will take some photos and post them here later.
The front (curved end) of the keel was difficult to do, requiring some brute force to hold it in place while the screws were driven. Then some of the hardened drywall screws broke off at removal because I had pre-drilled the pilot holes for them and they were now solidly epoxied in place. Luckily, they broke off deep enough that we simply filled the holes over them with epoxy. With the wisdom of hindsight, it’s good that we used hardened drywall screws, which will break before they bend or deform.
I came to the idea to extend the carlins late, thus the short pieces instead of extending them. It’s noteworthy that the kid contains long-enough material to extend them to frame 2 as a single piece on each side.
Installing the rails neatly was also a small challenge. In the end, they look good from the top, although the two strips don’t align with each other exactly on the bottom edges, being off in some places a millimeter or so, but those edges aren’t visible, so no worries about that. The rail pieces as received in the kit were not completely straight, which led to difficult alignment at installation. Lesson learned is that we should have aligned the pairs by feel on the bottom edges and ignored the alignment at the top, which is trimmed anyway to receive the deck.
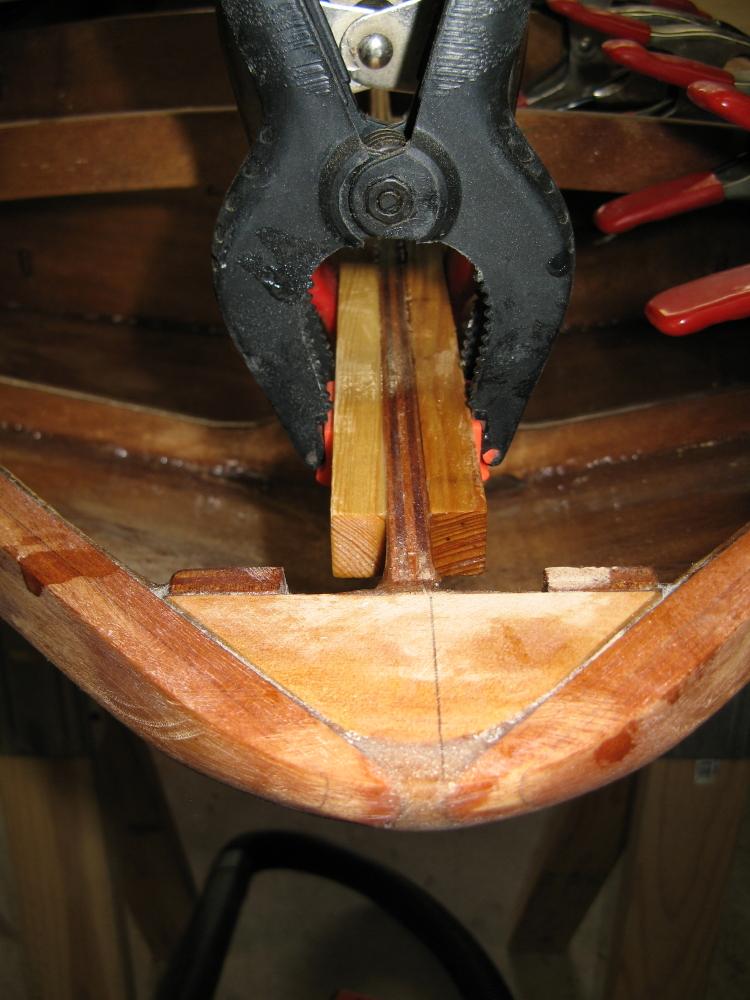
At the bow, we tapered the rails somewhat, rounded them on their ends around the front, and filled in gaps and corners with epoxy. Following the advice in the manual, we had rounded the bow block before the rails were installed; although the manual did not say explicitly to do this, it implies strongly the the bow should be rounded for safety. This left us with a small “hole” where the rails meet, which we filled with epoxy. I think that it looks good at this point, and we have verified that the deck–just barely–covers it.
At this point, we are low on epoxy with much work left to do, so I ran down to CLC last week and bought more, 1 gallon of resin and 1/2 gallon of hardener, and a pair of pumps. We’ve had to change out the pumps a few times as they gummed up and ceased working efficiently.
ParticipantJeffrey, contact me on e-mail at mcalon at juno dot com with your address and telephone number. I will contact you with my information, to get the clamps from you or meet you at the Lehigh event.
I’ll continue the description of how we end up installing the deck here, with photos if I’m able to post them, in a couple weeks after we’ve done it. Prep work such as epoxying the underside of the deck pieces, etc will be done between now and then.
Marty
-
This reply was modified 5 years, 7 months ago by
-
AuthorPosts